Google Colab Overview
Google Colab is a Python development environment that enables the remote development and execution of Python notebooks in the cloud, instead of on a local computer. It also offers easy integration with other Google products such as Google Drive and Google Sheets.
Accessing, Creating, and Sharing Notebooks
You should have access to Colab through your (university-issued) Google account.
Visit Google Colab to access your existing notebooks and create new notebook documents.
When creating a new notebook, practice giving the document a title (e.g. "My First Notebook"), and updating the notebook’s sharing settings, like you would any other Google Drive document.
From any notebook, it is possible to create a new notebook, make a copy of the notebook, or download the notebook, using the "File" menu.
When you access a notebook that has been shared with you, unless you have "Editor" privileges, you won’t be able to save your work, and any edits you make in that document will be lost.
So if you would like to work in a notebook that has been shared with you, you will first need to make a copy of the notebook, using the /“File/” > /“Save a copy in Google Drive/” menu option. Then when you make edits in your copy of the document, they will be saved.
Settings
When getting started with Google Colab, we recommend you update your editor settings using the gear icon on the top right.
Recommended editor settings:
- Tab using four spaces: to follow Python conventions, and so you can more easily visually distinguish between different the code indentation levels.
- Show line numbers: to help you reference certain lines of code when troubleshooting.
- Show indentation guides: to further help you visually understand the code indentation levels and avoid indentation errors.
- Enable code folding: so you can focus on certain parts of the code, and make the code more manageable to navigate.
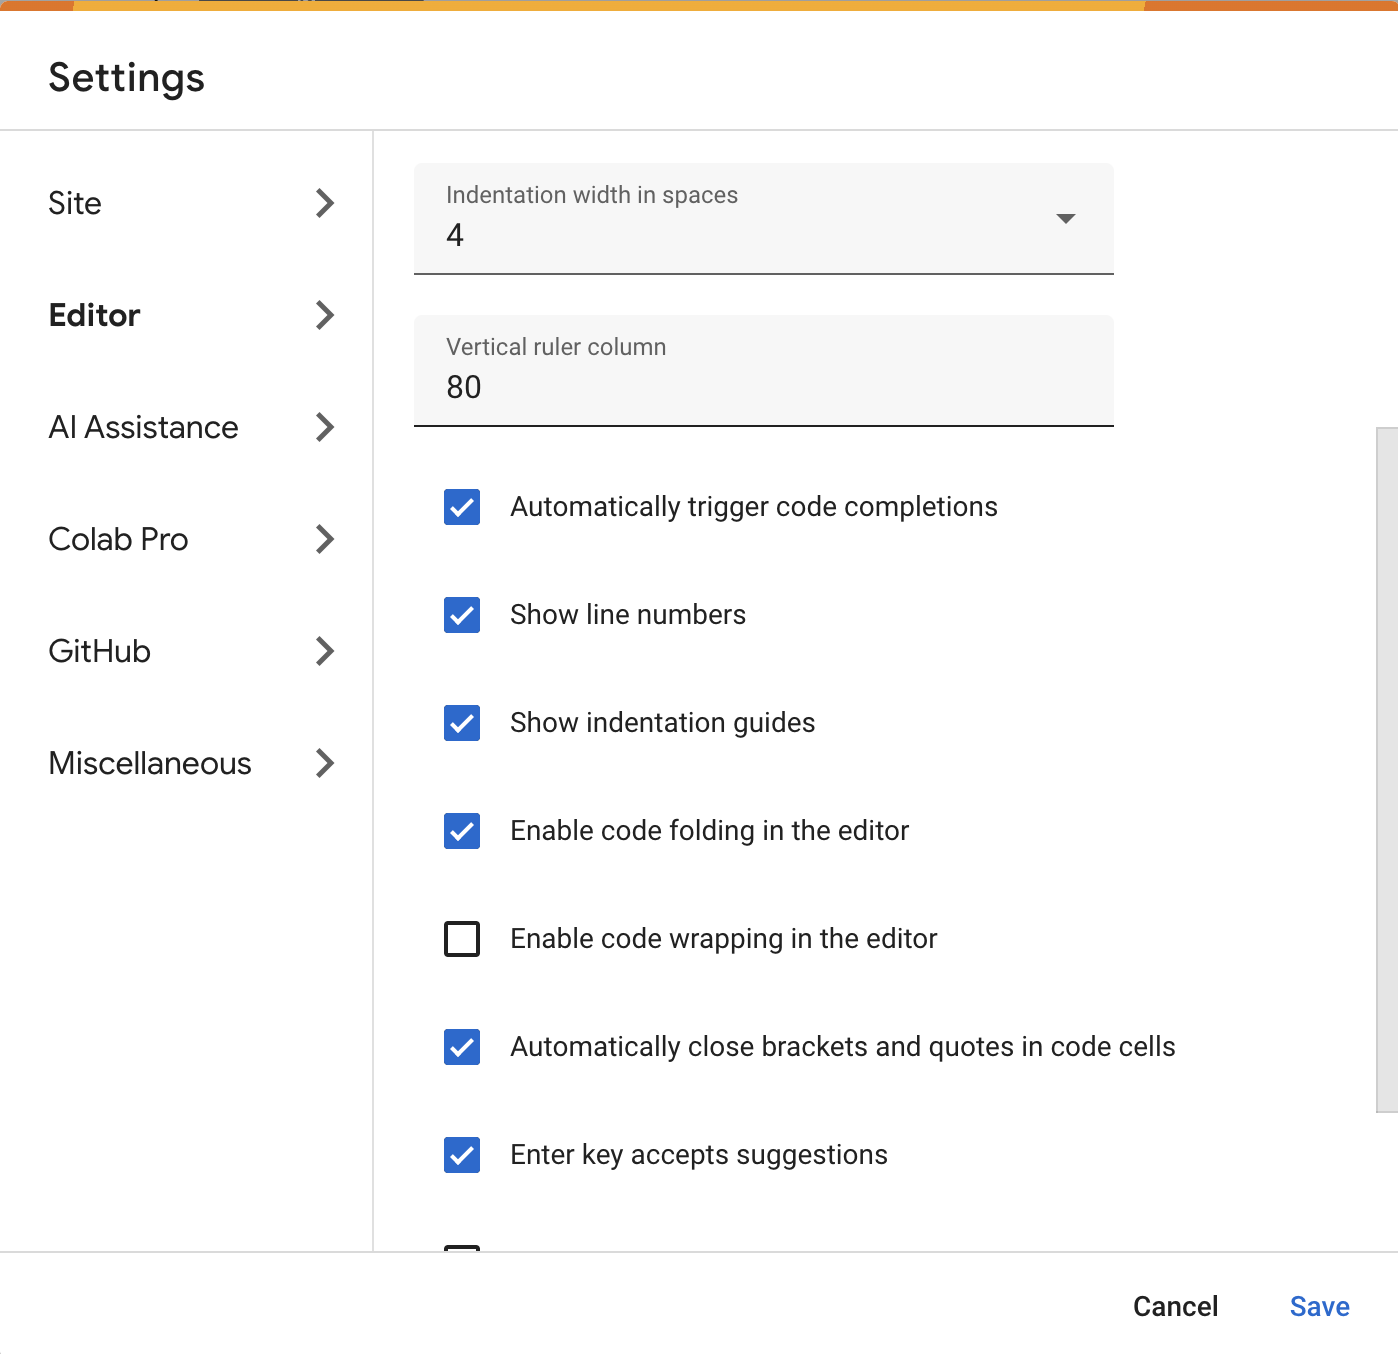
Remember to save your preferences before moving on.
These settings will be applied to all notebooks, not just the one you are viewing at the moment.
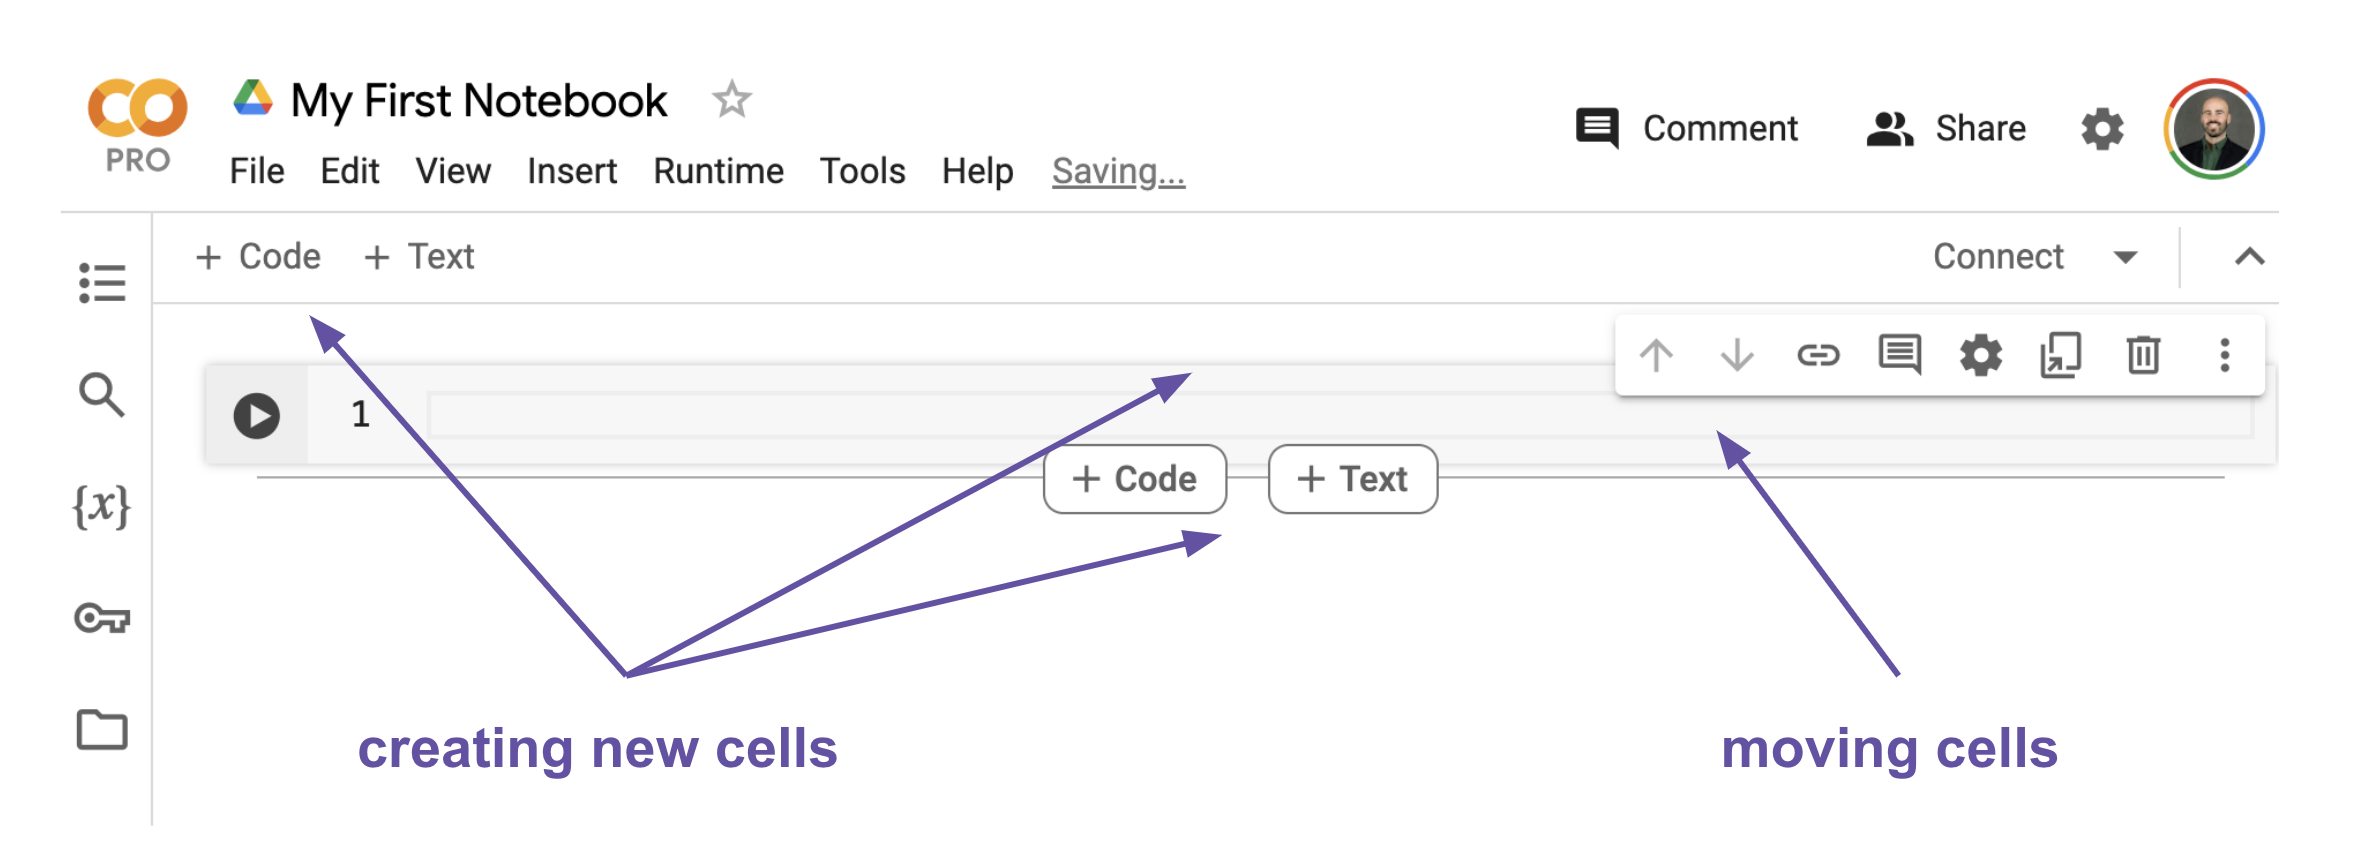
Cells
When getting started with Python notebooks, take some time to practice creating new cells, and moving them around. The easiest way to create new cells is by hovering the mouse over the middle top or bottom of the current cell, to create a new cell above or below the current cell.
Text Cells
We use text cells to provide context and instructions surrounding our code. For example, to explain a concept, share a finding, or describe setup steps.
In the text cells, we can write in plain English, or in a special syntax called Markdown.
Here is some example Markdown syntax, for use in a text cell:
# My First Notebook!

This is a text cell. It uses the markdown language. The line above is a heading, starting with the "#" sign. Remember "#" means something different in Markdown than it does in Python.

We can make links like [this](https://github.com/prof-rossetti).

And lists too:

  + Item 1
  + Item 2
  + Item 3
For more information about Markdown syntax, consult the Markdown Guide.
Code Cells
We use code cells to write and execute code.
In the code cells, we write in the Python language.
Here is some example Python code, for use in a code cell:
# this is a comment
# remember "#" means something different in Markdown than it does in Python

print("HELLO WORLD!")

x = 2 + 2
print(x)
After writing Python code like this in a code cell, we execute or “run” the code by pressing the play button, or by using a keyboard shortcut (“control + enter” on Windows, or “command + enter” on Mac). After running a cell we see any outputs displayed below.